Ludo Game
A React and TypeScript implementation of Ludo
Building a Modern Ludo Game: Architecting the Board with React
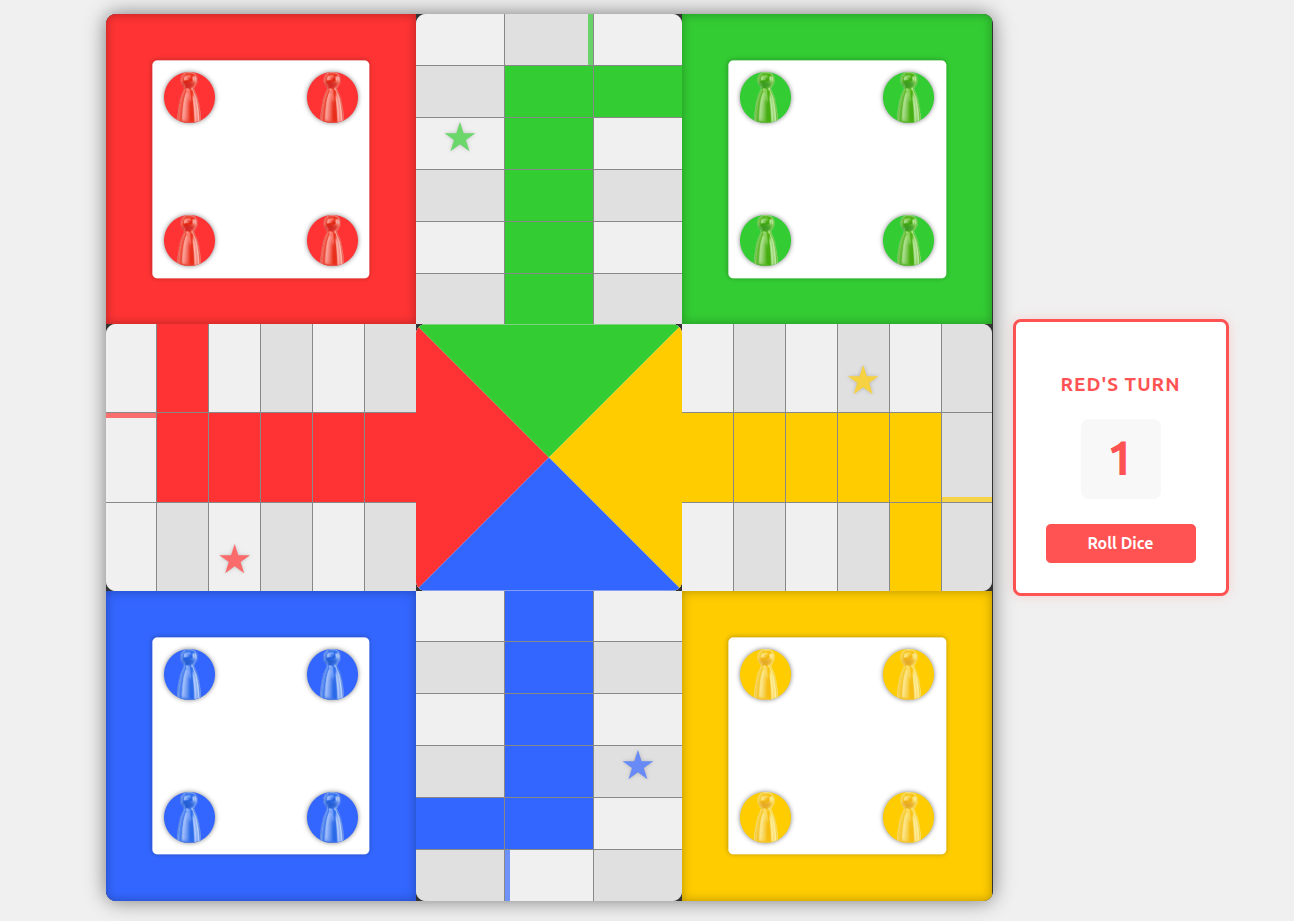
Board for Ludo Game
Recreating a classic board game like Ludo is a rite of passage for many web developers. It’s the perfect blend of complex state management, grid-based layouts, and interactive UI components. In this post, I’ll dive into the architecture of my Ludo implementation, focusing on how I used React and TypeScript to build a modular, responsive board.
🧩 The Architecture of the Board
A Ludo board is essentially a giant 15x15 grid, but treating it as a flat array of 225 cells makes pawn movement logic a nightmare. Instead, I broke the board down into logical "Zones":
- The Player Bases: The large squares where pawns start.
- The Paths: The cross-shaped areas (Top, Bottom, Left, Right) where the action happens.
- The Center: The "Home" triangle where the game ends.
The Main Layout (LudoBoard.tsx)
The LudoBoard component serves as the orchestrator. It uses a CSS Grid-based container to place the various sections. By separating the areas into distinct components, the codebase remains clean and maintainable.
const LudoBoard: React.FC = () => {
  return (
    <div className="ludo-container">
      <div className="ludo-board">
        <BoardCenter />
        <TopArea />
        <BottomArea />
        <LeftArea />
        <RightArea />
        <Base color="red" />
        {/* ...other bases */}
      </div>
      <DiceControls />
    </div>
  );
};
🛤️ Managing the Paths (TopArea.tsx)
Each path area (like the TopArea) is responsible for rendering specific segments of the board. This is where the pawns move. To keep the UI reactive, I used custom hooks to bridge the gap between the game state and the visual representation.
useBoardPawns: This hook calculates exactly which pawns are currently located in this specific area.- Dynamic Styling: Using conditional classes, we can easily identify "Star cells" (safe spots) or "Home entrances" based on configuration files.
const pawnsInCell = allPawns.filter((pawn) => pawn.position === cellNumber);

return (
  <div className={`top-area-cell ${isStarCell ? "star-cell" : ""}`}>
    {pawnsInCell.map((pawn) => (
      <Pawn
        key={pawn.id}
        color={pawn.color}
        onClick={() => handlePawnClick(pawn)}
      />
    ))}
  </div>
);
🏆 The "Home" Stretch (BoardCenter.tsx)
One of the most visually interesting parts of the Ludo board is the center square, where the four color triangles meet. This isn't just a static image; it needs to display pawns that have successfully "finished" the game.
I implemented a ColorTriangle component that takes specific coordinate offsets. As pawns finish, they are mapped to these coordinates to create a "stacked" effect inside their respective color zones.
Handling Finished Pawns
In BoardCenter.tsx, we filter the player's pawns to find those with the isFinished flag and slice our coordinate array to match the count:
const getFinishedPawnsCount = (color: keyof typeof state.players) => {
  return state.players[color].pawns.filter((p) => p.isFinished).length;
};

// Passing sliced positions to the triangle
<ColorTriangle
  color="green"
  pawnPositions={greenPawnPositions.slice(0, getFinishedPawnsCount("green"))}
/>
🎨 Reusable Components: The Pawn
The Pawn component is a great example of UI atomization. It doesn't care about the game logic; it only cares about:
- Color: Which player it belongs to.
- Status: Is it active (can it move)? Is it selected (bouncing animation)?
- Interactivity: Handling the click event dispatched by the game engine.
🚀 Key Takeaways
- Component Separation: By splitting the board into
TopArea,LeftArea, etc., I avoided a "Mega-Component" that would have been impossible to debug. - Configuration over Hard-coding: Using a
gameConfigfile to store cell IDs (STAR_CELLS,HOME_ENTRANCE) makes it easy to tweak the game rules without touching the UI logic. - TypeScript for Safety: Defining
PawnColorandPawnPositionsas interfaces ensures that we never pass an invalid color or a missing coordinate to our triangles.
Building this has been a masterclass in managing complex UI state. Next up, I’ll be tackling the Collision Detection logic—handling what happens when one pawn lands on another!
Would you like me to dive deeper into the CSS Grid layout I used for the 15x15 board, or perhaps explain the Dice logic next?